It's getting nice outside, and you know what that means... bike rides! I don't use my car much anymore. I mostly only drive to caricature gigs. I needed a sweet bike to ride to work, so I decided to build myself a fixed gear. It took some researching online about how to actually rebuild a bike into a fixed gear. I have never attempted building a bike. My only knowledge to this point was changing an occasional bike seat or flat tire.
I found a nice used bike at a bike shop in Philly called Firehouse Bicycles. It fit me real nice and was lightweight, just needed some love. A Raleigh Technium, with an aluminum frame. it came with beautiful shades of red, white, blue, and rust, not really my steez.

So I took it all apart, not really knowing how to get it back together again.

Sanded down the rust and clear coating, then starting spraypainting. My neighbor Brian hung out on the porch with Martha and I. That was a good day.

Some primer.

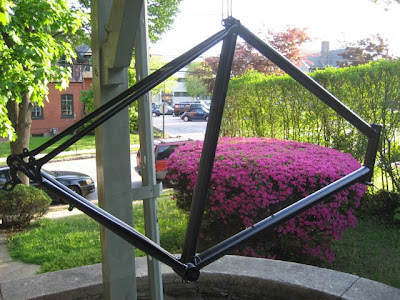
Decided to go with black. A couple coats and some clear coats on top of that.
I am missing photos of the following steps. I bought some new parts. A crank and back tire. Then I flipped the handle bars and chopped them off, repositioning the brake. I only have a front brake now. Probably the hardest part was learning how to take apart and reconstruct the bottom bracket. I had to buy a few bike specific tools, but I needed them anyway. It was dirty job, but those are often the most fun. So here she is...


So there we are, my very first bike all built by myself. About 90% of the tutorial I recieved was from online videos. And the other 10% from a local bikeshop. There are still a few small parts I want to update, like the pedals. I also still need to get a true fixed gear cog on the back. Mine is still a freewheel. But those will come in time. As for now I can finally ride my own bike to work, not Martha's. (I have been borrowing hers for several weeks now). I took it out a few times already and nothing has fallen apart yet. So I think I did it right.
Bike tuff!
*Update 5/11/2008*I recieved an email from someone who saw this post asking about more info of where I got the online tutorials. I thought I would post my reply in case anyone saw this and wanted to know...
This link is for a blog called Bob's Garage. The guy instructs you on how to take apart, clean, and put back together a fixie. He is a little bit on the corny side, but I found it really great. It's kind of like a This Old House for bikes. Only thing is there is no actual video, just still photos and him talking.
www.fixedgeargallery.com/index.htmlThat tutorial was a link off of
www.fixedgeargallery.com which is pretty awesome and has links to all types of things fixed gear related.
And probably one of the best is
www.bicycletutor.com these videos were really easy to understand and helped with alot of the technical stuff.
Of course there were a couple things I couldn't quite find a tutorial for, but nothing I couldn't figure out on my own after a couple minutes. Getting the bike apart was the first battle and I would recomend buying a chain splitter, crank remover, and an allen wrench set for bikes. I used those and couldn't have done the job without them. Also having large wrenches is a must. My local bike shop would have done it for me, but it would have cost money and taken a few days. Doing the work myself was the best part. I had to throw some money down on a new back wheel with a dual cog. I think thats what its called. I can have fixed on one side and a freewheel on the other. Then I can flip the back wheel when I want to switch. That cost about $100. But it was totally necessary and I plan on having it for a while. The cranks were only about $40. But if yours are already decent, you might be able to use the existing ones. I know Bob's garage shows you how to do that.
Oh yeah check out this website to see some awesome fixies...
www.frankencycle.com-Colin


